Saturday, March 26, 2011


Sunday, March 6, 2011
Office to Nursery: A remodeling story in pictures
First, a tour around the room as it was when we first moved in. We originally used the nursery as our office. Then we turned the "front room" into our office, leaving the nursery available for its remodel...


Step 1 of the remodel was to replace the windows. This was actually pretty easy:


(From the outside, new window on the left, old window on the right:)

(Nate in the window!)

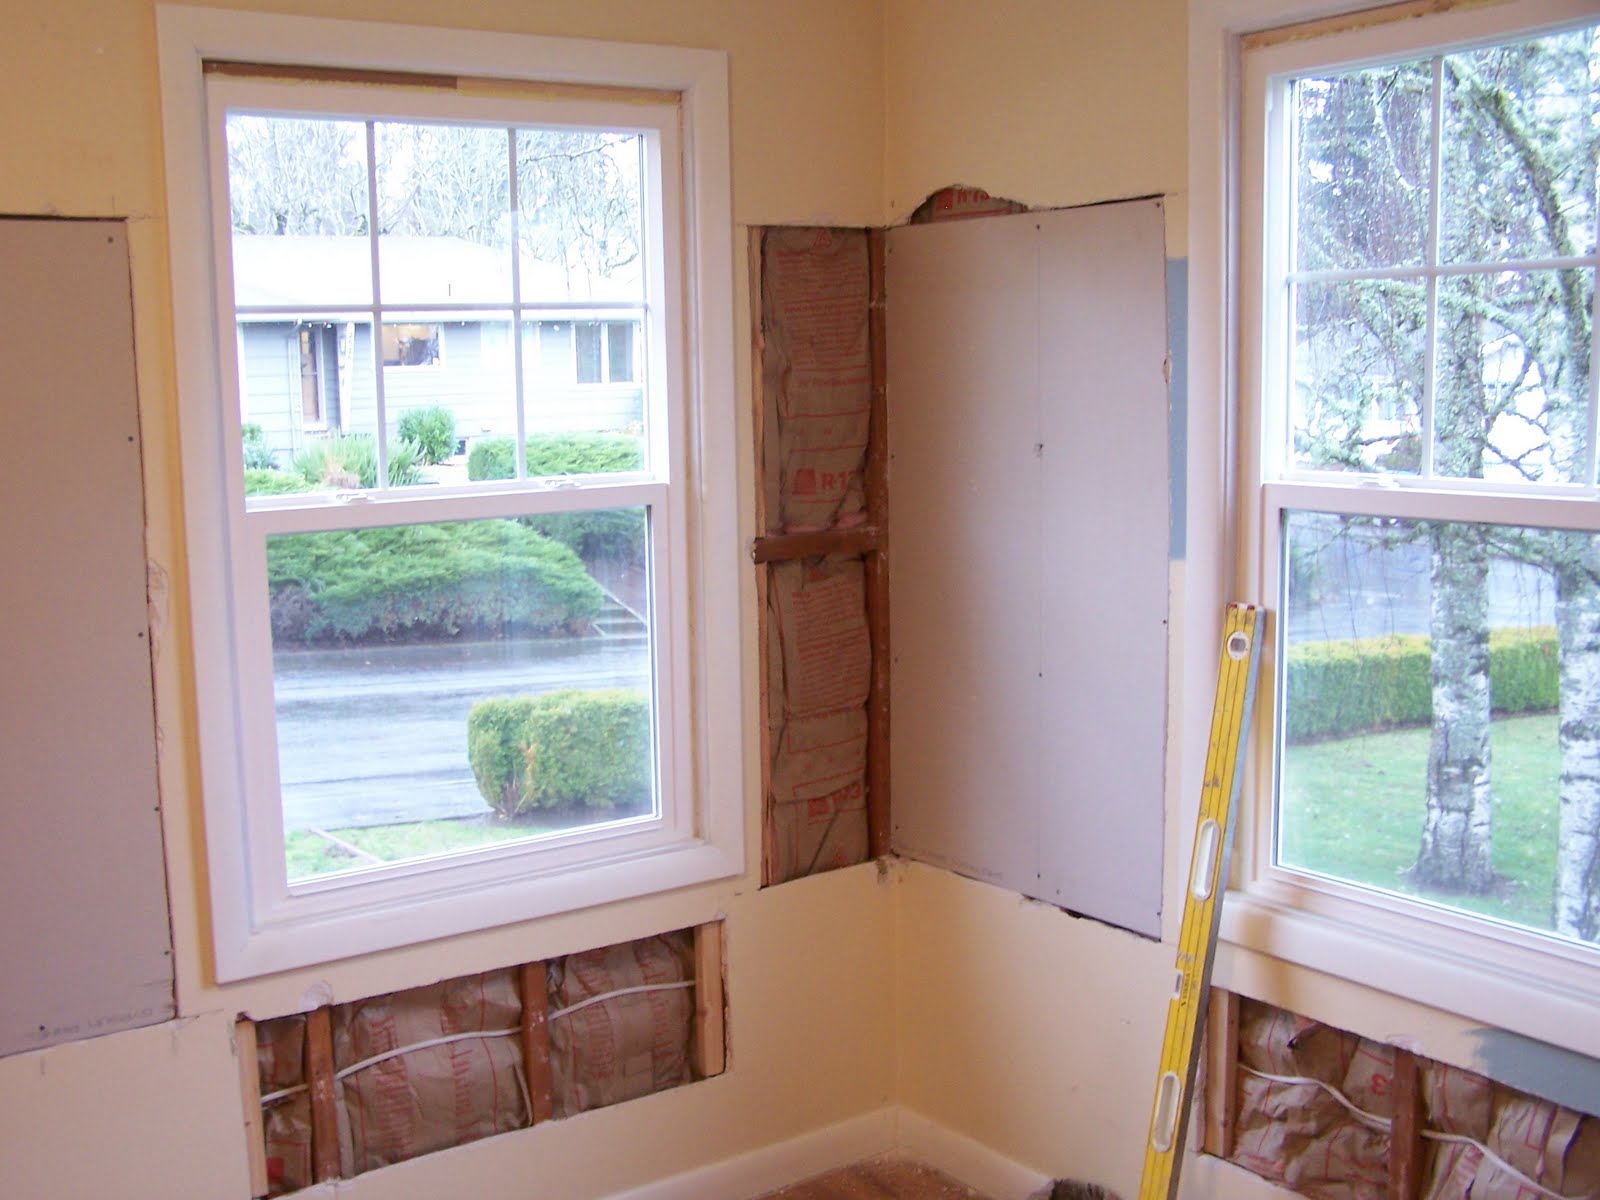
New windows:

We hired a contractor to do some of the work. He added insulation. We wanted rolls of insulation, not blown-in insulation, so he first cut out the old drywall:


(Nate helped:)


The insulation:

Our contractor, stuffing the insulation in the walls:


Then he patched the drywall:
And started mudding the drywall:


We then resumed control of the project. I used a texture gun to add texture to the walls, then primed them in prep for the new paint color:

Here's a shot of the new paint color. I started prepping the floors to be refinished:


A close-up of the floors, pre-refinish:

I sanded the floors using this awesome tool:

(Unfortunately the big sander doesn't get close to the edge, so I had to spend a few more hours on my knees with a small orbital sander to get the floors sanded all the way.)

Nate put the new coat of stain on the floor (too many chemicals in the fumes for me to safely do this work):

Stain finished, but not yet sealed:

Nate sealed the floor with polyurethane. It is also highly chemical, so again I couldn't help. I couldn't even be in the house. See how shiny they is? :o)

I gave my very talented mother some fabrics and some instructions. She made beautiful curtains for me. She asked if I wanted them lined and I said no... Then I put them up and changed my mind. So I added a lining and ironed in pleats:


And here's an around-the-room now that it is mostly finished and we've got the furniture in place. In the first picture below, the crib will go between the windows, next to the little chair:


And finally, here's video tour of the nursery in it's current state. About 40 seconds into the video I tried to show the space where the crib will go. Toward the end I show the blank wall behind the door; I'm going to put white bookshelves along the wall from floor to ceiling. (I'm very excited about the bookshelves!).
There are still quite a few things to do, but it will be a couple of months before I make enough changes to warrant additional pictures. Stay tuned!
Subscribe to:
Comments (Atom)